
How to Distress Furniture ~ Wooden Chest
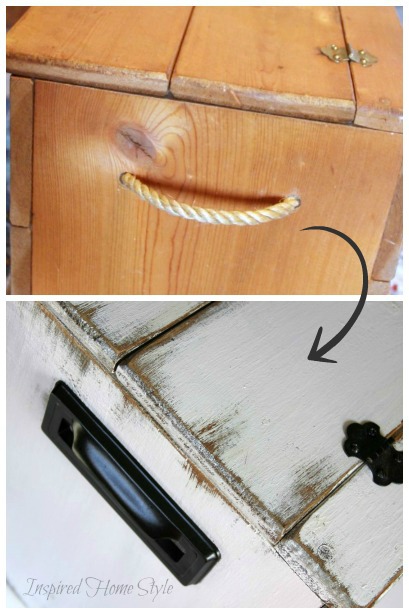
I love the look of distressed and chippy furniture. So when I found this little chest in the alley, I was beyond excited. I have been wanting to find a wood chest to use as an end table for a while. Plus it gave me an excuse to share how to distress furniture in only a few simple steps. To demonstrate, I turned a boring pine box into this rustic beauty
As you can see the top had seen better days and had black grease stains on the top. Maybe it had been living in someones garage? Nothing that a bit of love, sanding and paint can’t fix.

To achieve this distressed paint finish:
- Something to paint ~ preferably raw wood, not previously painted or stained pieces.
- Dark stain
- Vasseline
- Paint in your favorite color
- Sandpaper
- Clear wax ~ or some type of wood sealer
The best part about this layered technique is that it can create beauty out of…. well, something not so beautiful. This box was definitely. not. so. beautiful. before.
Quick Steps to achieve a beautiful distressed paint finish:
- Lightly sand your whole piece.
- Wipe with a damp rag or a tack cloth to remove any dust.
- Stain the entire piece with dark stain and let dry.
- Wipe sparingly with vaseline focusing on areas that would receive natural wear and tear (corners and edges).
- Paint. Nothing fancy, a couple of sloppy coats work great. Let dry.
- Use sandpaper (especially over the vaseline) to distress.
- Wax the entire piece, or use your favorite sealer.
This easy technique for creating gorgeous, aged finishes works on most on any raw wooden surface.
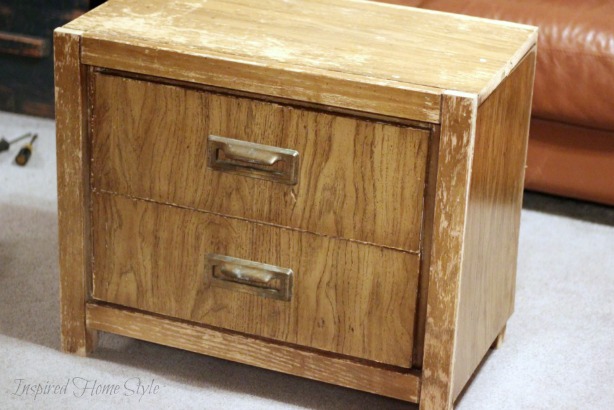
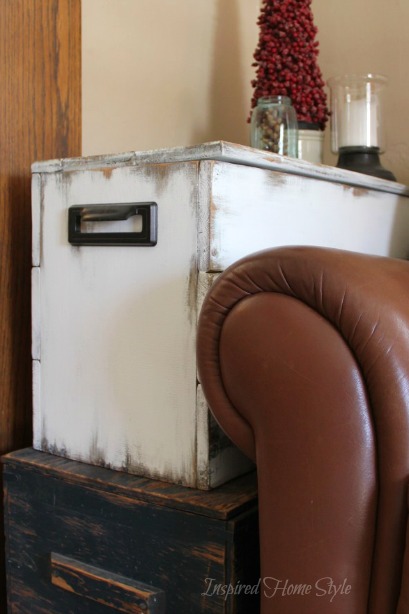
Next I needed to address the awful rope handles. I didn’t want to spend any money on new hardware, I felt like that would defeat the fact that this project was free. After a quick look through some of my furniture stash that is waiting to be painted, I spotted this little end table. I often find furniture in the alley and pick it up to refinish. I’m not sure why I grabbed this piece since it was really water damaged and made of fake wood, but I’m glad that I did. The handles were EXACTLY the right fit for my wood chest, and once I gave them a quick coat of rubbed oiled bronze spray paint they were perfect.
If you have not painted Hardware before, it is super EASY! I made a simple step by step tutorial on how to paint hardware just to make it easy for you.
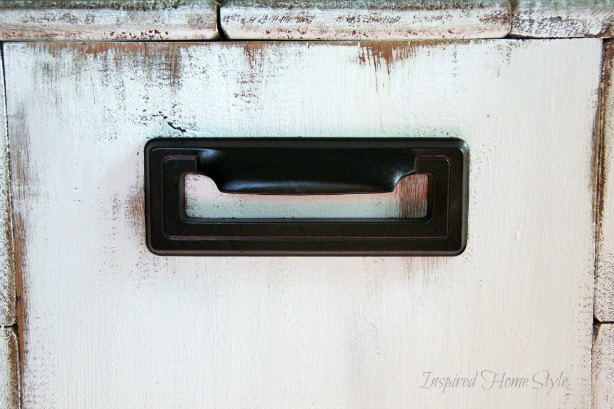
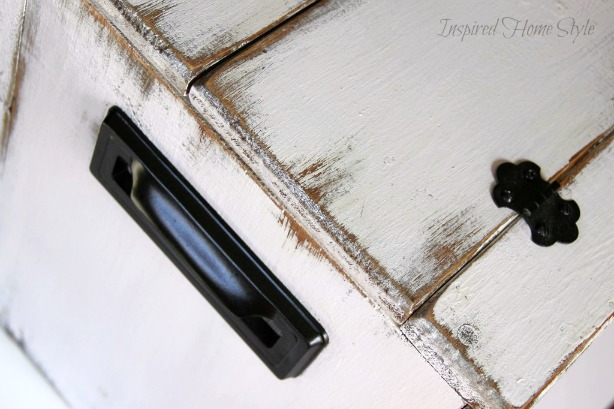
I love how the paint finish on the box turned out. I also love that this project did not cost me anything. The box was someones trash, the handles were stolen from another piece of furniture and the paint was left over from other projects. Plus as an added bonus now we have hidden blanket storage in our living room. Love it!
If you love distressed furniture, then you’ll love these adorable candle scones I made using discarded shutters. Or our Coffee Sack Art using a discarded wooden window. Plus don’t forget to check out our easy tutorial on how to paint hardware.
Until Next time
Tammy